
Returning to your neighborhood after floodwaters have receded is an intense emotional and physical experience. Standing on your driveway, seeing mud-coated walls, ruined furniture, and waterlines high up on your living room drywall can feel completely overwhelming. The instinctive reaction for most homeowners is to grab a shovel and start throwing away damaged items immediately. However, rushing into a flood-damaged building without a clear, safety-first plan can expose your family to serious structural hazards and severe health risks.
Floodwaters are fundamentally different from clean pipe bursts inside a home. According to environmental health standards, floodwater is classified as “Category 3” or “black water.” This means it is heavily contaminated with raw sewage, agricultural runoff, industrial chemicals, heavy metals, oil, gas, and hazardous micro-organisms. As floodwater sits inside a property, it saturates porous building materials, creating an ideal breeding ground for toxic mold, bacteria, and structural rot.
Restoring your home to a healthy, safe, and livable state requires a methodical, step-by-step approach. You cannot simply dry out the carpets and paint over the water stains; you must systematically decontaminate, extract moisture, sanitize infrastructure, and rebuild with resilient materials.
Ensuring Site Safety and Documenting Damage
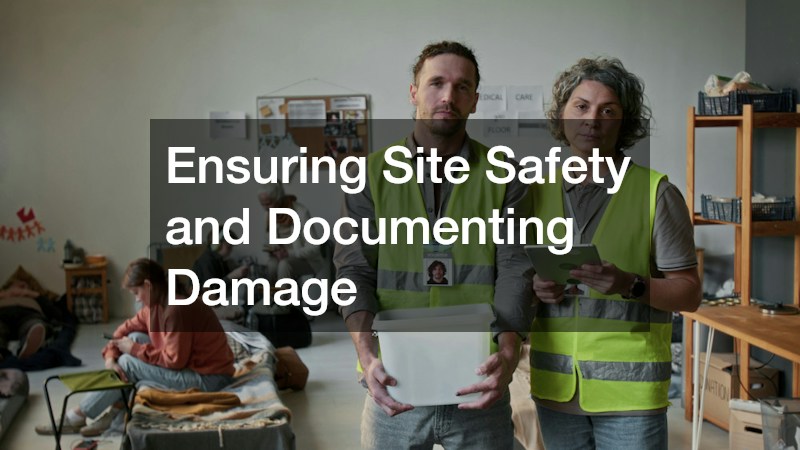
Before stepping foot inside a flooded home, you must verify that the physical structure is safe to enter. Floodwaters weaken subfloors, shift foundation walls, compromise electrical wiring, and create severe biohazard exposures. Never rush inside without proper personal protective equipment (PPE) and a clear assessment of environmental risks.
Your absolute first priority is isolating utility hazards. Do not enter any building with standing water until the main electrical breaker has been shut off by a qualified electrician or utility worker. Water and electricity are a fatal combination. If the electrical panel is located in a flooded basement, do not attempt to reach it yourself. Similarly, shut off the main natural gas or propane line to prevent fires or explosions caused by ruptured gas pipes or damaged appliance fittings.
Equip yourself with complete protective gear before stepping into the building. Wear heavy-duty, puncture-resistant rubber boots with steel shanks, thick N95 or P100 respirator masks to protect your lungs from airborne mold spores and dried silt dust, safety goggles, and heavy-duty nitrile or rubber gloves. Avoid touching your face or eating while inside the flood footprint to prevent accidental ingestion of toxic residues.
Before you begin removing water or discarding damaged belongings, document everything thoroughly for insurance purposes. Take high-resolution photos and detailed video walkthroughs of every room, showing the waterline height on walls, damaged furniture, ruined electronics, and structural cracking. This visual evidence is critical for filing flood insurance claims and securing disaster relief assistance.
- Shut off main utility lines: Disconnect electrical breakers, natural gas lines, and main water valves before entering the property.
- Gear up with heavy PPE: Wear P100 respirators, eye protection, heavy rubber boots, and chemical-resistant gloves at all times.
Executing Rapid Water Extraction and Structural Drying
Once the site is secured and documented, the race against the clock begins. Mold spores can germinate and colonize wet building materials in as little as 24 to 48 hours. Removing standing water and extracting moisture from the building envelope as quickly as possible is the single most important step in preventing permanent structural rot.
Begin by removing bulk standing water using submersible trash pumps, gas-powered water transfer pumps, or commercial wet/dry vacuums. Once standing water is cleared, non-restorable porous materials must be stripped from the building immediately. Drywall acts like a sponge, wicking contaminated water upward well above the visible flood line. Cut out drywall and fiberglass insulation at least 12 to 24 inches above the highest water mark to ensure all saturated materials are removed.
Carpet padding, laminated wood flooring, particleboard cabinetry, and soft insulation batts that came into contact with Category 3 floodwaters cannot be adequately disinfected and must be discarded. Subfloors, solid wood framing studs, and concrete foundations, however, can often be saved if they are stripped, disinfected, and dried thoroughly.
Proper structural drying requires commercial-grade equipment. Household fans and residential dehumidifiers are far too weak to extract deep moisture trapped inside structural wall studs and masonry. Partnering with certified specialists in local water restoration ensures that industrial air movers, high-capacity low-grain refrigerant (LGR) dehumidifiers, and wall-cavity drying injectors are deployed correctly throughout the home.
Skilled restoration technicians utilize non-invasive moisture meters and thermal imaging cameras to track hidden pockets of trapped water behind masonry walls, under hardwood subfloors, and inside crawlspaces. Professional water damage repair protocols require drying framing timbers down to below 12% to 15% wood moisture content before any new drywall or insulation can be installed.
- Strip saturated drywall and insulation: Cut away wallboard at least 12 to 24 inches above the highest visible waterline.
- Discard non-restorable porous flooring: Remove carpet padding, laminate flooring, and swollen particleboard cabinetry immediately.
Controlling Mold Growth and Eliminating Biological Hazards

Floodwaters carry massive loads of biological contaminants, including coliform bacteria, E. coli, salmonella, hepatitis viruses, and parasitic protozoa. As floodwaters recede, they leave behind an organic sludge that coats every surface. Left untreated, this sludge fuels explosive mold growth, contaminating indoor air quality and triggering severe respiratory illnesses.
Decontaminating structural framing requires deep physical scrubbing followed by chemical disinfection. Once mud and silt are physically washed off framing studs and concrete pads using clean water and detergents, apply EPA-registered botanical or quaternary ammonium disinfectants. Avoid using pure household bleach on porous wood framing; bleach consists mostly of water, and while the chlorine evaporates quickly on the surface, the water soaks into the wood, actually feeding mold roots deeper inside framing timbers.
When fungal growth covers extensive areas or infects interior HVAC ductwork, self-remediation becomes dangerous. Engaging certified professionals for specialized mold cleanup guarantees that affected zones are isolated using plastic containment barriers, negative air pressure machines equipped with HEPA filtration, and specialized media blasting techniques to strip embedded mold roots from wood framing.
If floodwaters contained heavy sewage backups, chemical spills, or decomposing organic matter, standard cleaning protocols are insufficient. You must engage certified environmental technicians trained in biohazard cleanup to safely extract bio-contaminants, apply broad-spectrum virucides, and safely package and transport biohazardous waste materials in accordance with state and federal disposal laws.
Before closing up walls with new drywall, conduct airborne mold spore testing and surface swab sampling. Verifying that indoor mold spore counts match or sit below outdoor baseline levels ensures that your home’s air quality is completely safe for your family.
- Physically remove mud and organic silt: Wash down concrete pads and framing studs with clean water and detergent before applying disinfectants.
- Apply EPA-registered antimicrobials: Use professional fungicides and quaternary ammonium disinfectants rather than household bleach.
Restoring Private Water Systems and Domestic Plumbing
Access to clean, safe running water is a fundamental requirement for a healthy home. If your property relies on a private groundwater well, floodwaters present a severe contamination threat. Inundated wellheads allow surface runoff carrying agricultural bacteria, sewage, and pesticides to pour directly down the well casing into subterranean aquifers.
Never drink, cook with, wash dishes, or brush teeth with private well water following a flood until the entire system has been professionally disinfected and laboratory-tested. Even if the water appears crystal clear, it can harbour microscopic pathogens that cause severe gastrointestinal illness.
Before restoring power to your well system, inspect all exterior electrical connections, control boxes, and pressure switches. Submerged electrical components on well pumps must be inspected, dried, and tested by a certified technician to prevent electrical short circuits or motor damage when power is restored.
To restore a contaminated private water well, the system must undergo shock chlorination. A concentrated solution of NSF-certified chlorine bleach is poured directly into the well casing, circulated through the entire plumbing network, and allowed to dwell in the distribution lines for 12 to 24 hours. Following the dwell period, the system is flushed out thoroughly onto the ground (away from septic fields and surface water bodies) until chlorine odors disappear.
Finally, inspect and service all point-of-entry and point-of-use filtration equipment. Floodwaters clog fine filter media and ruin delicate purification membranes. You must flush, sanitize, and replace all whole-house sediment cartridges, carbon blocks, UV lamp sleeves, and domestic water filters to ensure your drinking water remains pure and safe.
- Do not consume well water post-flood: Avoid drinking or cooking with private well water until it undergoes shock chlorination and lab testing.
- Inspect submerged electrical well controls: Ensure pressure switches, control boxes, and pump wiring are dried and tested before powering on.
Clearing Wastewater Lines, Septic Infrastructure, and Kitchen Assets

Managing wastewater systems following a flood is just as important as securing fresh drinking water. Submerged plumbing, saturated soil drain fields, and silt-filled sewer lines can cause catastrophic sewage backups into your living spaces just as you finish cleaning up.
If your property uses an on-site septic system, do not use household sinks, showers, or toilets while the surrounding ground remains completely saturated with floodwater. Operating a septic system when the soil absorption field is underwater forces untreated sewage backward into your home’s lower plumbing fixtures or causes hydraulic failure in the septic tank.
Schedule an immediate inspection by a licensed septic tank service provider. A technician will inspect structural tank walls, check baffle tees, evaluate effluent pumps, and pump out settled flood silt and solids if necessary. Pumping out a septic tank while the surrounding ground is still fully submerged with floodwater can cause empty concrete or fiberglass tanks to float or collapse; a certified technician knows precisely when it is safe to pump.
Interior and exterior drainage lines also require attention. Floodwaters carry heavy loads of sand, mud, gravel, and organic debris that settle inside underground drainage pipes and floor traps. Scheduling professional drain cleaning clears clogged main sewer lines, clears floor drains, and restores free-flowing drainage throughout your home.
Kitchen areas require careful environmental management during post-flood recovery. Flood-damaged refrigerators and pantries contain rotting food that creates severe odor and biohazard issues. When discarding contaminated food, collect used cooking oils, grease, and animal fats separately. Transport these kitchen wastes to certified local grease recycle collection points rather than pouring grease down flood-damaged drainage pipes, where it can congeal with silt and cause massive line blockages.
- Refrain from using plumbing during soil saturation: Avoid flushing toilets or running sinks while septic drain fields remain under water.
- Inspect septic tanks for silt accumulation: Have a professional verify tank structural integrity and baffle condition before resuming use.
Rebuilding with Mold-Resistant Materials and Preventive Design
Once your home is completely dried, disinfected, and certified safe by environmental testing, the rebuilding phase begins. Reconstructing a flood-damaged home is not merely about restoring it to its original pre-flood state; it is an opportunity to implement resilient design choices that protect your home from future water intrusion.
Traditional building practices rely heavily on paper-faced drywall, fiberglass batt insulation, and wooden subfloors—all of which degrade rapidly when exposed to moisture. When rebuilding lower levels, replace standard fiberglass batts with closed-cell spray foam insulation. Closed-cell spray foam expands to fill wall cavities, provides superior insulation values, creates a vapor barrier, and does not absorb water if submerged again in the future.
Swap out paper-faced gypsum drywall for fiber-cement wallboards, paperless drywall, or magnesium oxide boards along the lower four feet of wall framing. Pair these resilient wall materials with tile, polished concrete, or luxury vinyl plank flooring installed with waterproof adhesives. If a future minor flood occurs, these materials can be washed, disinfected, and dried in place without requiring complete demolition.
Elevate critical mechanical infrastructure well above baseline flood elevations. Move electrical breaker panels, wall outlets, HVAC air handlers, tankless water heaters, and laundry hookups at least 12 to 24 inches above local historical flood lines. Raising electrical outlets higher on living room walls prevents short circuits during minor water pooling.
Finally, strengthen your home’s exterior water defenses. Apply waterproof masonry coatings to interior basement walls, install high-capacity sump pumps equipped with dual battery-backup systems, and grade exterior soil slopes away from your foundation to direct heavy rainwater away from your home.
- Install closed-cell spray foam insulation: Use moisture-resistant spray foam in lower wall cavities instead of absorbent fiberglass batts.
- Choose paperless wallboard and cement boards: Install water-resistant wall materials on the lower portions of ground-floor walls.
Restoring Peace of Mind and Home Health

Recovering from a major home flood is undeniably a long, challenging journey. It tests your patience, physical energy, and financial resources. However, taking a deliberate, scientific approach to home restoration ensures that your living space is not just visually repaired, but fundamentally safe, hygienic, and structurally sound.
By prioritizing personal safety, executing rapid structural drying, decontaminating hidden biological hazards, restoring private water and wastewater systems, and rebuilding with flood-resilient materials, you eliminate the hidden dangers that floodwaters leave behind.
Your home is your family’s sanctuary. Taking the time to execute a thorough, uncompromising recovery plan transforms a disaster into an opportunity to rebuild a stronger, healthier, and more resilient home that will protect your family for generations to come.